
A Harbor Freight solar battery maintainer is a small panel and charge controller that plugs into a battery and keeps it topped up, so a parked truck, tractor, boat, or generator starts when you need it. It won’t charge a dead battery or run your home. Its job is to offset the slow drain of storage. The setup takes about 15 minutes, requires no special skills, and needs only a sunny spot for the panel and a battery you can reach safely.
That simple job matters in places where a vehicle is a lifeline. Out on rural reservations and remote homelands, where the nearest parts store can be an hour away, a battery that dies over a quiet month is more than an inconvenience. A maintainer is one of the most approachable ways to see solar work for you, using the same sunlight that powers larger community projects like those GRID Alternatives helps bring to tribal communities through hands-on training and installation.
Specs and included hardware change, so check the manual and the current product listing before you buy. Then confirm the unit fits your battery type and size. This guide walks through what you need, how to connect it safely, and how to tell it’s working.
What a Solar Battery Maintainer Does (and Whether It Fits Your Needs)
A solar battery maintainer does one job well: it supplies a small, steady trickle of power so a healthy battery stays full while it sits unused. Think of a truck parked all winter, a boat on a trailer, or an ATV waiting for planting season. Batteries lose charge slowly on their own, and a maintainer quietly replaces what drains away. For a plain-language primer, see this maintainers overview.
A full charger is a different tool. It pushes a lot more current into a battery to bring it back from a low state, which is why it’s the better choice after a battery has been run down. A maintainer simply doesn’t have the muscle for that. Expect it to hold a good battery steady, not rescue a failed one.
So does it fit your situation? It’s a good match if you have seasonal vehicles, ranch or farm equipment, a community center generator, a boat, or an ATV that sits for weeks at a time and has a clear, sunny spot nearby. It’s a weaker match if the equipment lives in a dark shed with no light, or if the battery is already worn out.
Because models and stock change, check the current product listing and the manual before you buy. Look for the panel wattage, the battery types it supports, and the warranty terms, rather than trusting what you remember from an older version.
Tools and Materials to Gather Before You Begin
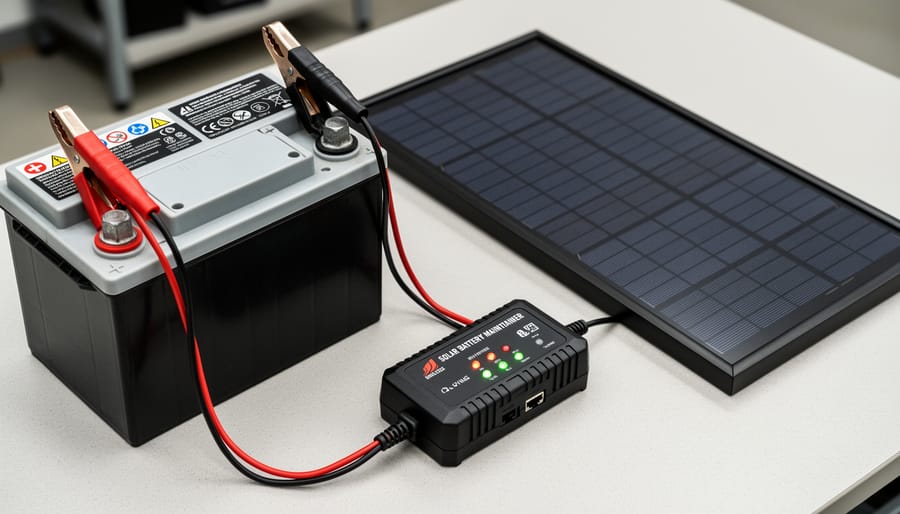
A little preparation makes this a ten-minute job instead of a frustrating afternoon. Gather these items first, so you aren’t hunting for a wrench with a clamp in one hand:
- The maintainer kit: panel, controller, and clamps or ring connectors, so you can confirm nothing is missing from the box.
- The 12-volt battery you plan to maintain, since the kit is built for that voltage.
- A clean rag and a baking-soda-and-water solution, for scrubbing away corrosion that blocks a good connection.
- A wrench or socket set, needed only if you must loosen terminals or attach ring connectors.
- A multimeter, which lets you check battery voltage before and after so you know it’s working.
- Optional mounting aids like suction cups, tape, or a dashboard spot, to hold the panel steady in sunlight.
Before you head outside, sit down with the product manual for ten minutes. Look for the supported battery types, what the indicator light means, and any limits on panel placement. Specs and models change, so the manual that came with your kit, plus the current product listing, beats anything you remember from an older version.
Then pick your spot. Look for a place with strong, unobstructed sunlight for most of the day, away from shade from trees, rooflines, or a shed. It should also be secure and out of the way of foot traffic, so the panel and cables stay safe from wind, curious hands, and accidental tugs.
Safety Warnings and When to Stop
Working with a 12-volt battery is routine once you know the ground rules, and a few simple habits keep it that way. Start by putting on safety glasses and a pair of gloves. Batteries can contain acid, and a splash is easy to prevent. Work outside or in a well-ventilated space, since charging batteries can release flammable gas. Keep cigarettes, open flames, and anything that might spark well away from the battery. If you want to understand why small ignition sources matter around stored energy, our look at solar fire risk is a helpful companion read.
Next, mind your metal. Set wrenches and other tools down away from the terminals so nothing can bridge positive and negative. Never touch the two clamps to each other, even briefly, because that can throw a spark. Go slowly, connect one clamp at a time, and you’ll stay in control.
Before you connect anything, give the battery a good look. Check the case, the terminals, and the cables. If something seems off, pausing is the right call, not a failure.
Other signs that mean it’s time to stop include a rotten-egg smell, a bulging case, or frayed or damaged cables. In any of those cases, step back and ask a qualified technician for help. Your local recycling facility can also tell you how to dispose of a damaged battery safely. Finally, follow the manufacturer’s instructions and the battery’s own labeling. They always take priority over general advice.
Step-by-Step: Setting Up Your Solar Battery Maintainer
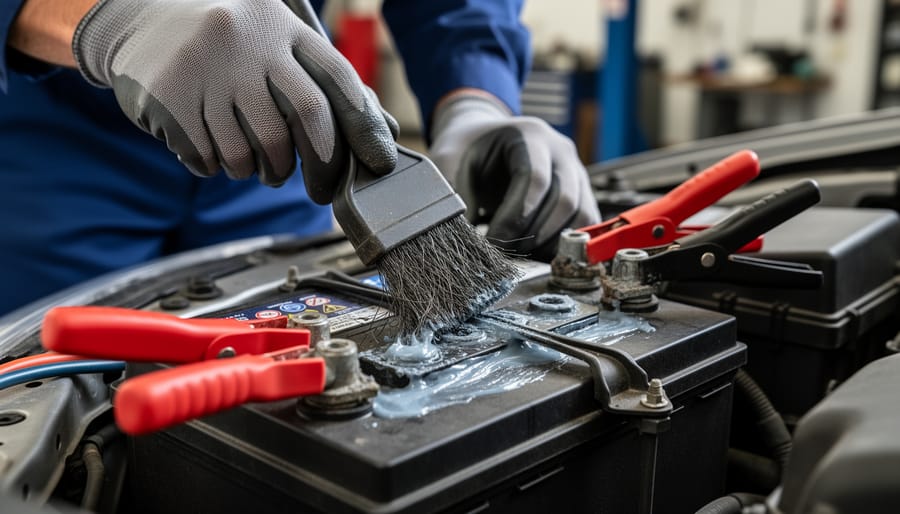
Setup goes quickly once you take it in order. Read your kit’s manual first, since clamp styles and plugs vary by model, then work through these steps:
- Inspect the battery. Look for cracks, leaks, swelling, or heavy corrosion. If anything looks off, stop and review the safety section above.
- Clean the terminals. Scrub away any white or green buildup with a rag and a baking-soda-and-water mix, then dry them completely.
- Confirm the battery is 12-volt and a compatible type. Check the label on the battery, then compare it with the supported types listed in your maintainer’s manual.
- Choose your panel spot. Pick a place with strong, unobstructed sunlight for most of the day, away from walkways where it might get bumped.
- Connect the positive clamp first, then the negative. Red goes to the positive terminal, black to the negative. If your kit includes ring terminals or a plug-in connector, use those instead and follow the manual.
- Route the cables safely. Keep them clear of belts, fans, hot engine parts, and anywhere they could be pinched by a hood or door.
- Secure the panel. Use the mounting method that suits your setup so wind can’t knock it loose, and tuck it out of obvious sight if theft is a concern.
Your setup will shift a little depending on what you’re maintaining. On a parked truck, the dashboard is a common spot, and the cable can usually slip through a door seal or the hood edge with care. On a boat, keep every connection dry and tidy, and secure the panel against both movement and spray. For a tractor in a shed, you may want to place the panel outside in the open and run the cable in, since indoor light is rarely enough.
A word on placement: sunlight through a window can work in a pinch, but glass and angle both reduce what reaches the panel. Shade-prone spots will slow things down, and open sun is always the better choice. Your multimeter check later will show you whether your spot is doing the job.
Putting It to Work: Real-Life Uses and Community Stories

Think about the machines your community counts on: the pickup that hauls water to a remote home, the generator waiting in the community center for the next outage, the ATV used for seasonal work, the tractor resting in the shed all winter. A weak battery can turn any of them into dead weight at exactly the wrong moment. A small solar maintainer keeps that battery ready, quietly, using nothing but sunlight. If you want a deeper look at how to protect your investment that guide pairs well with this one.
It helps to picture a few everyday cases. A family parks a truck for the winter and trusts it to start in spring. A tribal office keeps a backup generator on standby for storm season. A shared community van sits unused between events but needs to be dependable when a trip comes up. In each case, the habit is the same: check the battery, connect the maintainer, and let the sun do the steady work.
These small routines connect to a bigger story. The same sunlight that tops off a single battery also powers larger solar projects across Indian Country, where communities are building energy independence, learning through hands-on training, and creating local jobs. Electron Freedom shares that vision alongside GRID Alternatives, with support from Wells Fargo. For a broader look at tribal resilience solar explore how reliable energy helps communities prepare for and recover from hard moments.
Caring for everyday equipment is a first step in that larger journey: practical, empowering, and rooted in self-determination.
Verifying Your Setup and What to Do Next
Once everything is connected, give it a few sunny days before you judge the result. Start with the indicator light, if your model has one, and read the manual to learn what each color or blink pattern means, since it varies by unit. Then grab your multimeter and measure the battery voltage at the terminals. Note the number, then check again over several clear days. A reading that holds steady or creeps upward is exactly what you want to see. A healthy, fully charged 12-volt battery generally rests somewhere around 12.6 volts or a little higher, though your manual and battery label are the better guide.
Here’s a simple checklist to keep handy:
- Check the indicator light against the manual each time you visit.
- Measure resting voltage and jot down the date and reading.
- Wipe dust, pollen, and bird droppings off the panel with a soft, damp cloth.
- Look over the cables and clamps each season for cracks, fraying, or corrosion.
- Confirm the clamps are still snug and the panel hasn’t shifted out of the sun.
If the voltage keeps sliding downward even in good sun, the battery may simply be at the end of its life. Batteries wear out, and no maintainer can bring back a tired one. When that happens, recycle it responsibly and start fresh.
Curious about how the same sunlight powers much bigger projects? Electron Freedom shares educational resources and training opportunities that can take your first small solar win and grow it into real skills.
Frequently Asked Questions About Solar Battery Maintainers
Can I leave it connected all season?
Maintainers are designed for long-term upkeep, so leaving one connected while equipment sits idle is the whole point. Check the manual for your model’s guidance, and glance at the clamps and cables now and then to make sure nothing has loosened or corroded.
Will it work on cloudy days or in shade?
Output drops when sunlight is weak, and a panel sitting in steady shade may not deliver much at all. Open, unobstructed sun gives the best results, so pick your spot with that in mind.
Can it charge a completely dead battery?
Usually not. A maintainer is built for gentle upkeep, not recovery from a deeply drained battery, so a dead one typically needs a full charger first. Your manual will spell out the limits for your model.
Can I use it on a car parked inside a garage?
Only if the panel can reach real sunlight, such as through a window with a clear view of the sky. Even then, glass and indoor light cut output, so a spot outdoors or a different charging method may serve you better.
Which battery types it supports can differ from one model to the next, so confirm that on the current product listing and in the manual before you connect anything. The manufacturer can answer any model-specific questions the paperwork doesn’t cover.
A solar battery maintainer is one of the simplest ways to put sunlight to work. A small panel, a few careful connections, and your battery is ready when you need it, with no outlet and no extra cost on the power bill.
Every small step with solar builds knowledge and confidence. The same sunlight that keeps a truck battery healthy powers larger projects across Indian Country, where tribal communities are leading the way toward energy independence. Explore Electron Freedom, learn about its partnership with GRID Alternatives, and find ways to learn, support, or get involved. Your next step with solar could start on a sunny windowsill.